Forward!

The convection loop started in reverse again this morning, so I re-plumbed the water side of the system with the hot side going in to the upper element port rather than through the lower element port and the chimney pipe. That didn’t work either. Since I was using shark-bite fittings on the solar loop, I switched the solar hot and cold lines just so see if that would make difference. Nope. I switched them back, cooled down the whole system by refilling it with cool water, and it immediately started pumping in the correct direction and the solar side stayed much cooler than yesterday when the convection loop was flowing in reverse.

We installed 6 sensors on the tank and 4 on the solar loop plumbing around the tank. Tomorrow well install some thermocouples on header and maybe down into some of the evacuated tubes.


Soft Tank

The copper coil heat exchanger was a little too wide for any of my containers, so I built a soft tank from 10′ of mylar coated bubble wrap and a garbage bag.. It’s well insulated and leak tight. I’m going float Styrofoam balls on the surface for added insulation. I got this idea from Tom Gocze almost 30 years ago. He still sells them at the link below. So far I the tank hasn’t exceeded 140F, so I haven’t really tested the high temp limits.

http://www.americansolartechnics.com/products/solar-packages-kits/softank-kits/

The Heat Pipe Geyser Pump Works!


This is the first attempt at using the header and vertical stand pipe as a heat-pipe with a 10-tube collector. It seems to be functioning well, but there is a significant ΔT across the  steam pipe header. In full sunlight the dead end of the header runs at about 270F and the exhaust side runs steadily at 230F. The geyser pump exhaust runs at about 160F and is moderated by the tank temperature. The ΔT across the heat-exchanger is about 20F indicating a good pump rate from the geysering.

My next experiment will be to insert some kind of wicking agent into the header pipe to more effectively draw liquid to the dead end. My theory is that the dead end of the heat pipe is over heating because the liquid is evaporating before it reaches that end, thus the high ΔT across the header.

Heat-pipe Epiphany

As I was starting to design the straight-through header I mentioned in the previous post, I was preparing a presentation about heat-pipes to an inventors group I meet with weekly. While playing with a naked heat-pipe and handling it while heating the evaporator end in a cup of hot water, I was amazed at how effective it was at transferring heat. I did some googling and found formulas for describing how effective it is, and I was even more amazed. I dawned on me that I could create a heat-pipe that extends upward from the header. I tried this with my little 4-tube show model. I just attached an elbow on one end and plugged the other end of the header. I attached a vertical 3/4″ x 12″ pipe onto the elbow and capped the end with an evacuation port. I added enough water to half fill one of the two header pipes, evacuated it from the top port and set it in the sun. The temperature of the top of the vertical pipe was only a few degrees below the temperature of the header pipe. I insulated it, but left the top 2 inches of the vertical pipe open to the air. The temperature of the naked pipe got up to 280F in partial sunlight.

I realized that I might be able to transfer the heat from the header to a vertical nucleating riser using this idea. I built one the next day and it worked great. The only problem was there was a large temperature difference between the two ends of the header. The capped end was getting much hotter because the liquid dropping back down into the header from the condenser was not flowing all the way to the capped end, so it was overheating. I have read that horizontal heat pipes requires some sort of wicking or capillary agent to move the liquid. One promising idea is to line the header with copper screen. Even with the large delta T the system was pumping heat to the heat-exchanger and storage tank.

I have only a few digital thermometers to determine the temperatures in the systems. I need better temperature data.


Geyser Pump Stagnation

The vacuum tube geyser pump worked well for about a week, Then, one day, it locked up. The header pipe approached almost 350F, but the vapor condenser remained relatively cool. The system pressure stayed well below one atmosphere, approximately 12 In. Hg vacuum. My theory is that rather than nucleate boiling, the fluid in the header just evaporated, and the header emptied to its ends where a surface of water maintained an equilibrium evaporating just enough into the header to maintain slightly positive pressure. The rest of the system lost enough heat to maintain a vacuum in the vapor condenser. I was able to start the pumping again by drawing a little bit of vacuum or letting a little air in to the system, and then it would pump for the remainder of the day, but would not start pumping the next day.

The solution to this would be to modify the header so that it has active artificial nucleation sites, but the holy grail I am seeking is to use the headers without modification, but I plan to test the nucleation theory by building a straight through 3/4″ I.D. header with a 3/4″ O.D. nucleator. 

To build a straight-through header, I will have to build wrap-around sockets for the heat-pipe condensers. I’ll build it with removable high-temperature insulation and install thermal sensors at several points on the header. I’ll start with a 4-socket header, and if it works, I’ll try to pump a 10-tube slave collector. If that doesn’t work, I’ll try building a 10-tube geyser pumping collector with a straight-through, nucleating header.


Crickets looking for new roofs

Friday, I picked up 6 complete Crickets from Solar Assist in Eugene, Oregon. They were about to scrap them. I now have 4 heat exchangers, too. Also on Friday, someone in Eugene called and said he had a Copper Cricket in his garage and was wondering what he should ask for it to sell to his neighbor. 

Homeowners are removing the collectors to re-roof and can’t justify the expense of re-installing them. It’s a strange statement about the change in values from 20 years ago. Many of the homeowners removing the systems are not the original owners. I can see their point. In Eugene, we still pay less than 6 cents per kWh. A new tank now costs about $400 and a typical re-install and fill costs $600-$800. At about $100 savings per year, that’s a 10-year payback. That’s about the payback of a new system when these were sold with tax credits and rebates in the ’80s.

Installers now urge homeowners to buy heat-pump water heaters. They have a much easier installation, and we’re told that they have at least a 10-year life-expectancy.

Dyer Restart in Bend Oregon – October 27, 1012

Lance Dyer first contacted me in August. I stopped in to see his Cricket while returning home from a camping trip in Bend. His Cricket had stagnated because the house had been in foreclosure for over a year. The house plumbing had been ‘winterized’ leaving no water in the solar tank. When they took possession of the home, in the Spring of 2012, the Cricket was not working. Lance called around to local solar companies and they recommended swapping out the 20 year old system for a new one. He found my Web site and connected me the day before I was leaving to camp within 5 miles of his home.

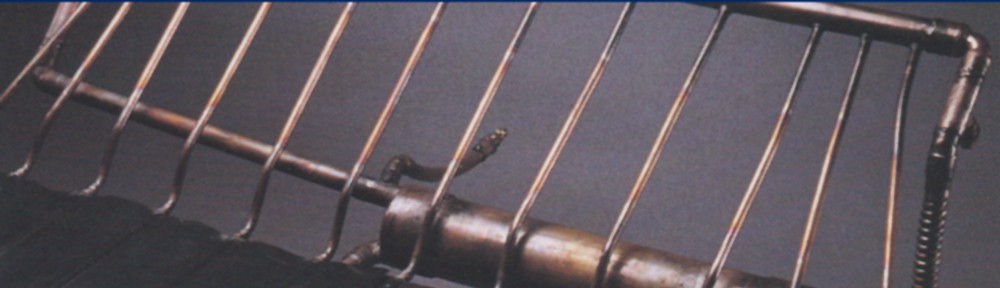
Upon my arrival he already had the ladder in place. It is a first story installation only a few yards horizontally from the storage tank. A standard two-tank system with two 50 gallon electric water heaters. The fuse plug had blown, but no other damage was apparent. I told him I would return with a charging kit. My charge was lodging plus $170. The Dyers also fed us lunch, dinner and beers while we watched the Ducks play. All in all it was a very pleasant vacation.

They lodged us (Elizabeth came with) in a nice Best Wester motel in Sisters.

We arrived Saturday at about 12. Here’s what we did.

  1. Install fuse plug with RTV
  2. Install drain valve – I didn’t remember that the second generation Crickets used ¼” drain valves. Luckily I had brought a bag full of spare parts and used many of them throughout the day.
  3. Pressurize system to 110PSI. I needed a yellow jacket hose with a tire type schraeder valve. The system held pressure.
  4. Mix the Methanol. 4 gallons of distilled water, 1 gallon methyl alcohol in the night start tank. I plugged it in, and the temperature went immediately to 95 degrees F. I thought the tank was working although very slowly. We went to a pub to watch the end of the Ducks game, but saw only the last touch down of a 70 to 14 emasculation of the Buffalos. We returned.
  5. Check the pressure. Still at 110 PSI. There was some fluid in the heat-exchanger so we installed the actuator valve and hooked it to the long evacuation line and let the air pressure drive out the fluid. Then we evacuated from the bottom of the system for a while. The gauge read 21 in hg. Not quite enough, but I thought we might be able to achieve a sufficient vacuum if the fluid was hot. The fluid in the night start tank was still at about 90F when we returned. Clearly the tank was not working and the raise in temperature initially was caused by the exothermic reaction of the combination of the alcohol and water.
  6. After a bit of work, I determined that the thermostat switch on the night start tank was not working and clicking out at about 100F, so I wired the element directly to the power cord. The tank heated to 160F within 20 minutes. I referred to this as hot-wiring the bomb.
  7. I removed both Schrader valves, top and bottom, cleaned the orifices with a pipe cleaner and replaced them with new vitol valve stems.
  8. I noticed that the vacuum assemply gauge was not working  and some of the connections were leaking. Also, both of the actuator valves were inoperable. One was bound, and the other would not depress the valve stem. I happened to have one of my own that did work, and I also had a replacement gauge.
  9. I evacuated the system at the roof an achieved about 23 in hg.
  10. I connected the drain port of the night start unit to the schraeder valve at the heat exchanger and let the fluid fill the heat exchanger.
  11. The fluid reached a height of less than a foot with the hot fluid and the poor vacuum so I pressurized the night start tank to 30PSI. The system filled. I kept the evacuation going until fluid ran into the evac hose. I turned the vacuum on and off for a while until I was certain the system had been completely filled. I let fluid drain from the drain port, opening the evac system to atmospheric pressure. I added about a pint back into the system.
  12. I evacuated the system to 20 in hg. Removed the evacuation device and put away my tools at just about dark, ~6:30 PM.

Sunday:

We returned to the collector on Sunday morning and checked the vacuum. It remained at about 20 in hg. I would have thought it would have been lower since the system had been hot the night before. But, the evacuator was not able to pull more of a vacuum than that, and it still leaked a bit, so I drew as much of a vacuum as it would draw. The sky was very dark with a bit of rain.

  1. We uncovered the collector.
  2. I drained the excess fluid from the drain valve, replaced the ¼” plug with RTV sealant. [ I don’t think applying RTV to a wet fitting is optimal. I think it would be better to drain a bit more from the bottom of the system so the threads of the drain port could be dried with a rag, or heat. Applying heat from a torch to a cold system should not be dangerous. ]
  3. I added a bit of fluid into the evacuation port, and re-evacuated the system to 20in hg. I could do no more than that.
  4. Elizabeth and I went shopping for a few hours hoping that the sun would come out, but it didn’t. So I packed up all of the tools.
  5. I bought a 4” pvc knock-out plug at Home Depot to replace the lost plastic hood port. I think these are probably a little more durable, but they need to be glued in with RTV.

[The access port in the hood is too tight to get the evacuation actuator valve in comfortably. The hood port should have been cut an inch to the right to allow more room for the actuator and replacement of the fuse plug.]

NIGHT START TANK

I think the idea for night start was in the right direction, but the tank seems to me to be unwieldy and dangerous.

  1. The tank still has a sacrificial rod in it. Why? When I drained the tank there were bits of white crumbs in the fluid. This has potential to introduce some ongoing reaction in the fluid. [Could this be the cause of the internal corrosion that stopped Eric Thurston’s system at the fluid surface near the top of the down-comer?]
  2. How much time is required to drive out the air from the fluid? How much is removed just by the combination of the alcohol to the water? Heating and evacuating the tank has the potential for dangerous discharges of hot methanol.
  3. Pressurizing the hot tank adds more danger. I didn’t release the pressure from the tank after we finished filling the collector and accidentally opened the funnel valve after setting the unit into the back of my car. It shot fluid and air into the air with a lot of force and sprayed near my face.

NIGHT START IDEA

Rather than using a water heater, use an on demand water heater and small pump to circulate near boiling water in the domestic side of the heat exchanger. Fill the collector system from a bag of pre-mixed fluid from the bottom using another small electric pump, while evacuating the system from the collector.

This would allow any air to boil out of the system while is fills and comes into contact with the hot heat exchanger. The fill pump would have sufficient pressure to drive fluid past any vapor traps, while the heat would force the vapor out of the heat-exchanger.

The hot fluid would fill the cold collector, but would already have release its trapped air. The only air left in the system would be the small amount trapped on the inner surfaces of the nucleators.

A RETURN TRIP.

I told the Dyers that their system would probably run, but it would not be very efficient with such a poor vacuum. I would have to return or send them a vacuum pump. I think it’s best if I return with a vacuum pump and do it myself.

All that might be necessary is to draw a vacuum on a sunny day with the system already at a temperature about 160 but not quite at atmospheric temperature.

Two reasons we were not able to draw an adequate vacuum were that the water pressure/volume to his hose was inadequate and there were leaks in the evacuation system. There was a four connection ball valve on his water outlet. That might have been too constricting for the vacuum pump on his 50′ of hose.

THERMOMETERS:

On the systems I have worked on in the past year, I have found that the inclusion of just one thermometer is a hassle. All three thermometers are necessary to determine of the system is operating. Since the Letro thermometers are so expensive. I am going to try to use cheap digital thermometers attached to the outside of the copper tube. Ideally these would be glued to the pipe with silicone and insulated. The digital thermometer stems could be bent 90 degrees to allow for a solid connection and ease of viewing. I am going to test this on my systems.

For testing purposes a set of 4 digital thermometers attached to a data acquisition using would be very helpful. If it could connect via Bluetooth to an Android pad, the system could be very closely monitored and analyzed.


Valve Insight

I received a call today from Rich Baker in Massachusetts who is working on a crippled cricket. It has an  estimated 40′ run between the collector and the heat exchanger, and the solar pad / solar tank has been replaced with an electric water heater with an internal heat exchanger.  He said the system worked for a few days, but then quit. What really amazed me is that they were able to swap out the heat exchanger without draining the solar side and evacuating the system at the collector because there were valves on the solar loop that isolated the heat-exchanger from the solar loop. At first I shuddered. You can put a valve in this evacuated system. Every time we tried the valve leaked. But then I realized that with at least 35′ of fluid above the valves, the valves are never under a vacuum, they are most likely under pressure, so even if they leak, no air will enter the system other than air that might dissolve into fluid exposed at a leak. So, why not install valves down by the tank on really tall systems? How about 3-way valves that could direct heat to something else, like a second tank, a cooling fin for overheat protection, a kitty litter heater, etc.

Thanks for the call Rich. Good luck getting this system back on lin

Summer 2012

The summer has flown by without a lot of new work on this solar project. I have heard from several new Cricket owners who have inherited their Crickets with their new homes. Some are still working fine, others were left to sit idle and overheated. I’m working on an re-charge kit and instructions for folks who want to re-charge their own systems. All of the systems I have visited this summer have been intact and if not working, ready to be re-charged.

I have acquired 2 Crickets that were abandoned: one is a model A and the other a B. I intend to set these up for experiments comparing the new do-it-yourself system.

My plan is to develop a do-it-yourself system the parts of which can be purchased for about $1000. I would like to lead workshops to show groups of people how to build and install their own systems. We would build one entire system at the workshop and then help the owner install it, while teaching everyone how to evacuate and charge the system. This low-cost system would probably not be eligible for tax credits or utility incentives because the sizing and materials would be dependent on local availability and the needs of the owner. For instance, rather than using hi-tech glazing and selective collector surfacing, we would use standard tempered glass from sliding glass doors and best-quality paint for the collectors. The collectors could be any shape that fits the owner’s roof, and could be increased in area to overcome the losses of the less efficient materials.

The most technical process of the building of the collectors is the silver brazing of the copper tubes in the collector. Silver brazing is a very easy-to-learn skill requiring an oxy-acetylene brazing torch. I recently lead a demonstration of silver brazing to about a dozen hands-on guys who had never seen it. Within minutes they were all able to braze odd copper parts together with strong, reliable joints.

Anti-Capitalistic Incentives are the Bane of the Renewable Industry

In the 1970s a thriving and rapidly expanding U.S. solar water heating market was destroyed by tax credits and the promise of utility company incentives. The manufacturers and entrepreneurs who had built the industry without artificial incentives were instantly overrun by over-funded companies that were selling the incentives rather than the products that capture free energy and convert it into useful heat or work. Since the dawn of the tax credits for solar energy that sprung up in response to a completely unrelated and rigged oil embargo of the ’70s, solar energy has carried the perception that it is not viable without some form of assistance.

It’s happening now in the PV industry. Government incentives have created a vacuum that China has happily filled over the brim with its capitalism killing build for a loss then takeover the world strategy. Headlines today from the Renewable Energy News at RenewableEnergyWorld.com are disturbing evidence of this  industry-murder-in-progress:

  1. Political Reality and the Way Forward for Renewable Energy:Political heavyweights know this about their rough-and-tumble game – you project victory long before the results are in. And when you think you’ve won, you never give your opponent an opening.
  2. Asia Report: India Slashes Wind Incentive: India has drastically scaled back tax incentives for wind generation in a move that many fear will halt new wind energy investment while derailing the manufacturing base that has grown up to support that growth
  3. Solar Struggles Continue: Q-Cell to File for Bankruptcy: Germany’s Q-Cells, a solar industry giant that helped usher in a new era of solar energy, announced Monday that it will file for bankruptcy, but that it will continue to work to restructure. Since August of last year, several solar companies, including Solon, Solar Millennium, Solyndra, Evergreen Solar and SpectraWatt, have filed for bankruptcy. On Monday, Solar Trust of America, the developer for the 1,000-MW Blythe project, also filed for Chapter 11.
  4. Solar Supporter: Clinton to Give Keynote at SPI: This is the year of politics, so who better to speak at America’s largest solar show than perhaps the most skilled politician around

The governments are killing the organic growth of the industry by creating barren hybrid organizations that are dependent on artificial and unnatural nourishment to survive. These hybrids almost never survive unassisted in the wild. Hybrids are greedy, beautiful on the outside, but empty on the inside.

If you want a great solar water heating system, and you want to build one yourself without government or utility assistance, the geyser pump is a good start: copper pipe, copper fins, black paint, aluminum box frames, glass, water, methanol, two refrigeration quality schraeder valves, and the ability to silver-braze the components together. We built the first dozen prototypes in a back yard with primitive tools. Anyone can do this with a little assistance in sizing the pipes and positioning the components. The intent of this Website is to provide that little bit of assistance required for anyone to convert excess solar energy to hot water.